Battery and charging
Brian has a built in lithium-ion battery, hidden behind a back lid. Read long term storage and service for more information.
Charging
To charge the battery, connect Brian to a USB-C charger. Brian supports fast charging from PD (power-delivery) chargers or PD power banks. When you don't have a PD charger, you can still charge using a normal 5V usb charger using USB A to C cable, but the charging will be slow.
Note
Brian can be charged while in use. Note that when the power consumption is high (motors running) it may happen that the robot will be slowly discharging even when connected to the power source. This is indicated by red status led and slow charging icon in the status bar (see statuses, errors, indicators)
Battery life
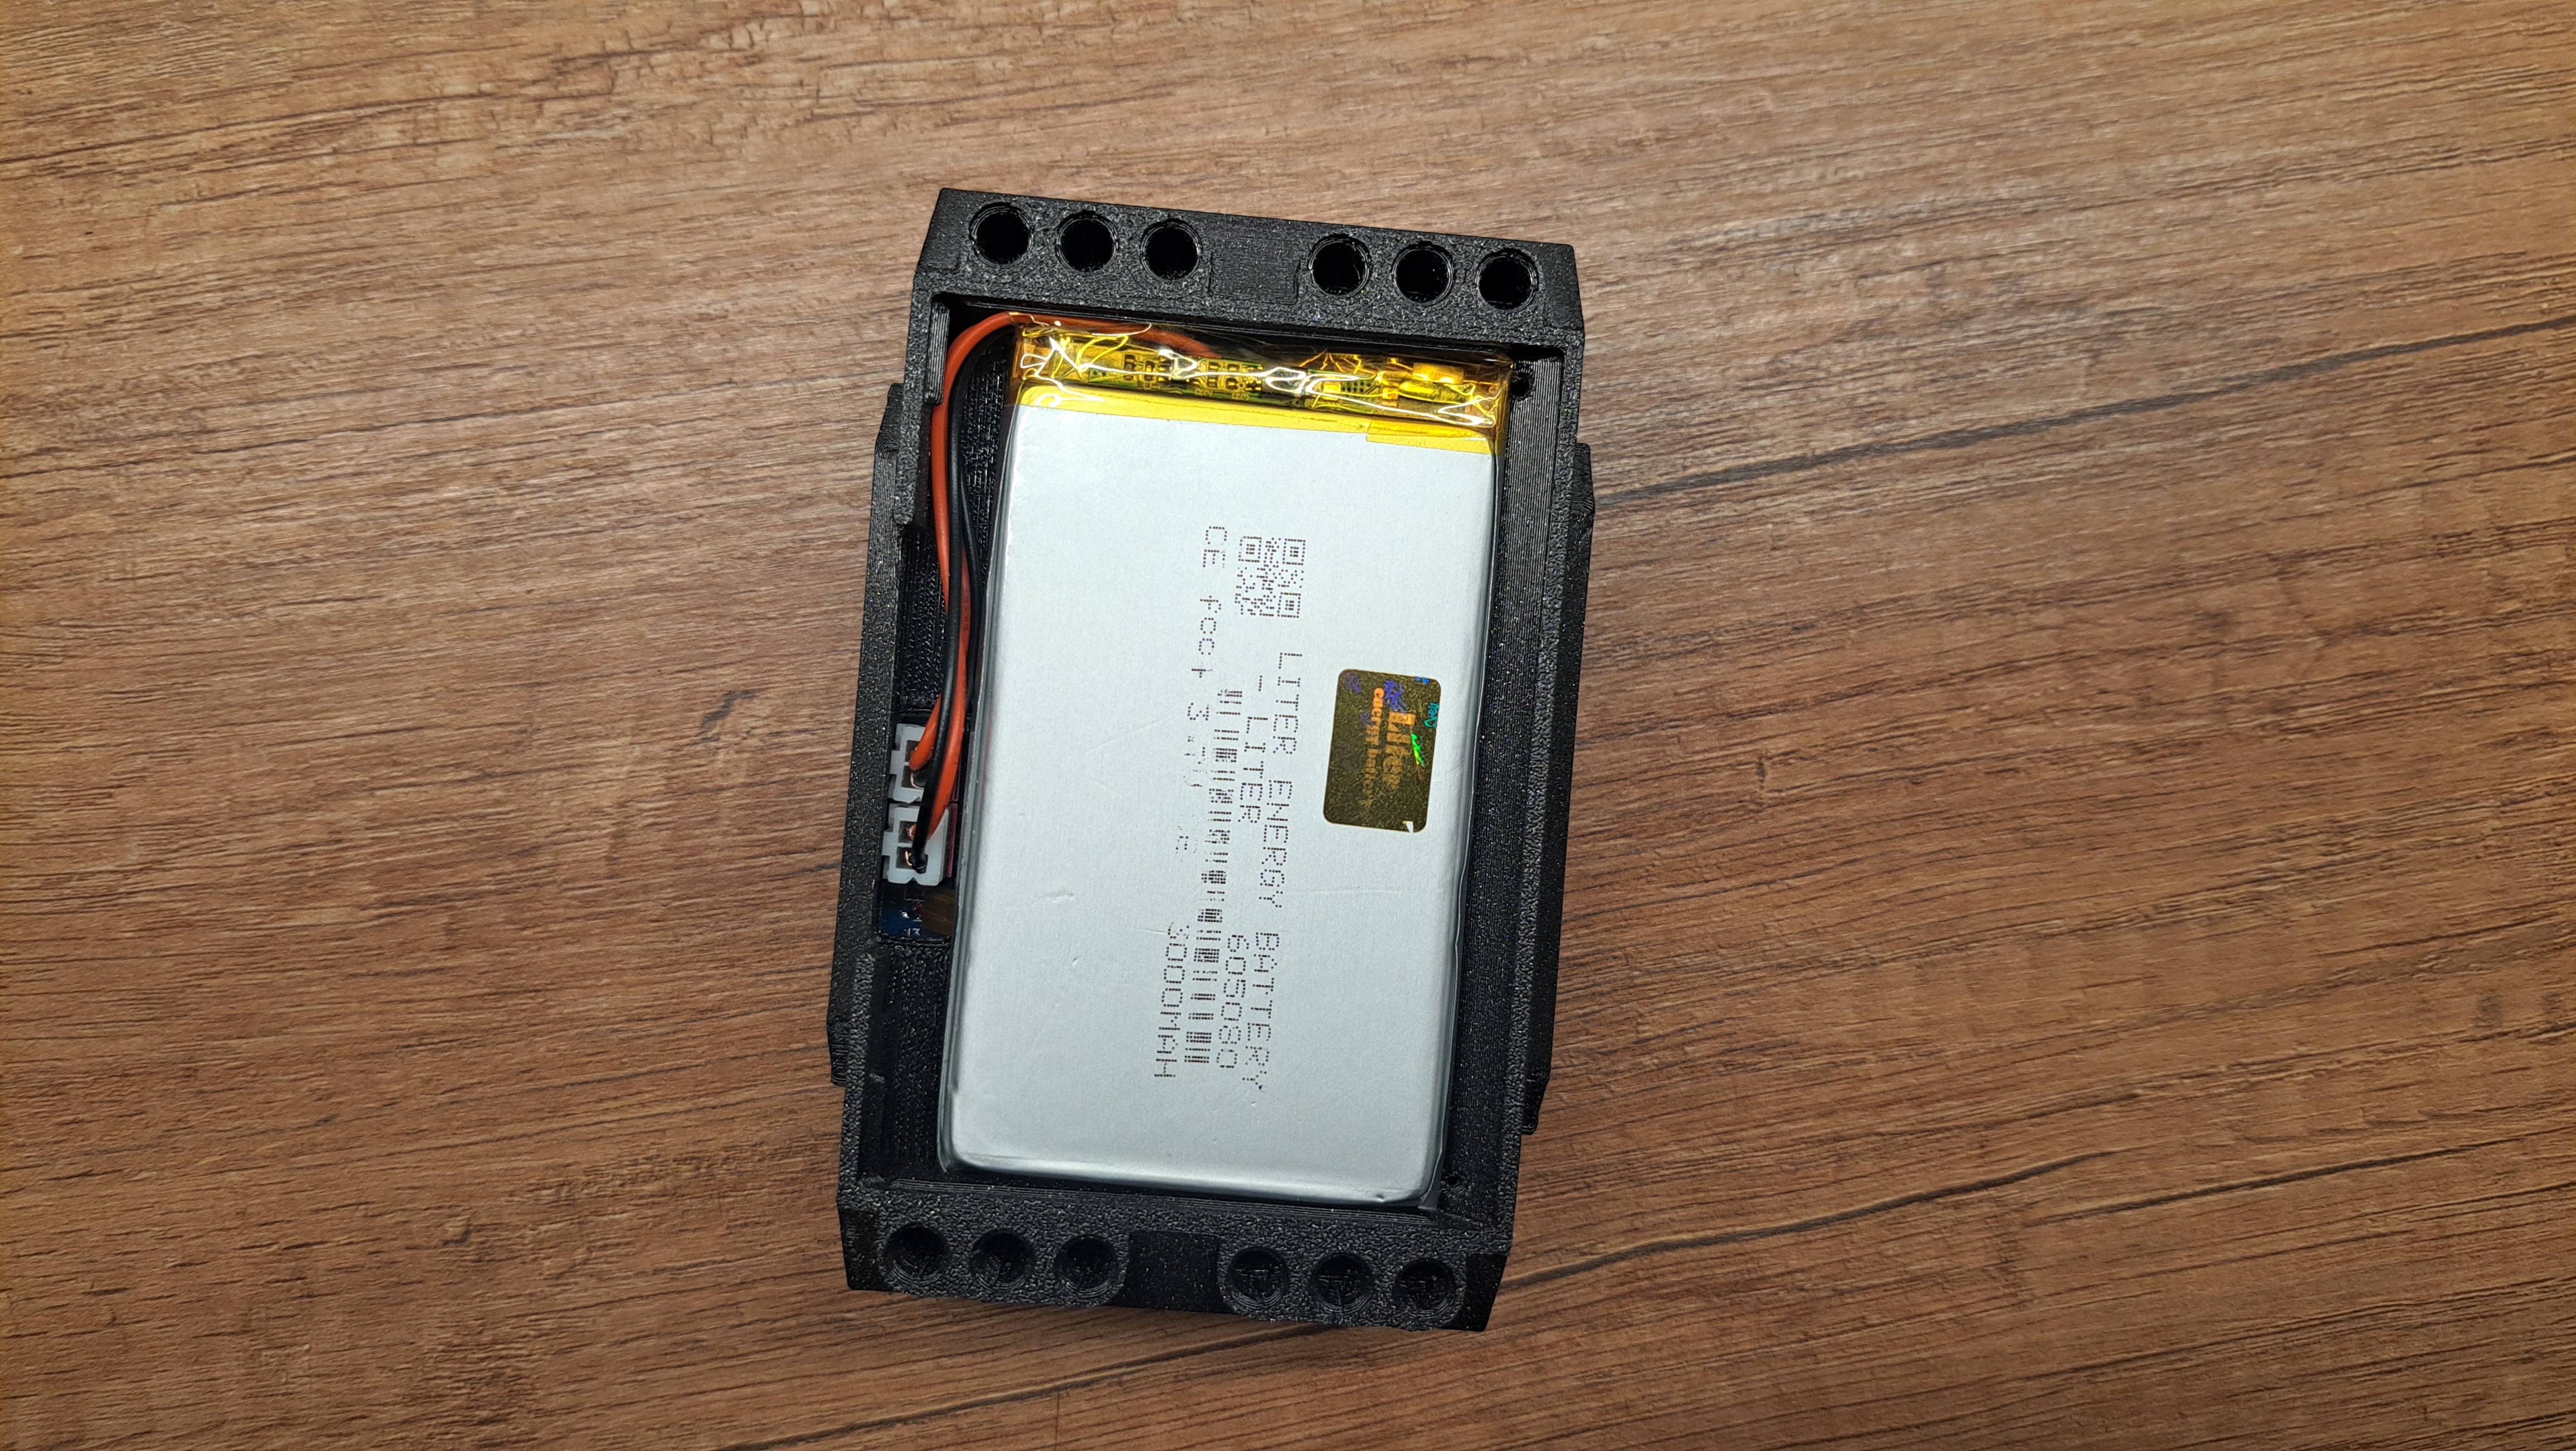
Battery capacity is 22.2Wh - 3Ah @ 7.4V (2S, nominal 3.7V.)
Expected battery performance:
| Scenario | Capacity change | Duration |
|---|---|---|
Classical line follower robot
|
Start at 100%, died at 20% | 180 min |
Line follower robot continued
|
Start at 20%, died at 10% | 20 min |
Idle
|
Start at 100%, died at 5% | 10 h |
Idle (low brightness)
|
Start at 100%, died at 2% | 20 h |
Fast charging
|
5% to 70% | 30 min |
Fast charging continued
|
70% to 100% | 110 min |
Fast charging (slower)
|
5% to 70% | 90 min |
Fast charging (slower) continued
|
70% to 100% | 110 min |
Slow charging (normal USB)
|
5% to 70% | 11 h |
Please note that these measurements are indicative only. Your milage may vary, as battery charge/discharge rate depends on lots of factors, such as the age of the battery, surrounding temperature, exact power draw (motors/sensors/brightness/heavy computations/...) and many other factors
Tip
Brian can be charged while in use. To prolong your project's runtime, place an external power bank into your robot and run while connected. USB-C PD power banks are recommended for this use case.
Long term storage and service
Batteries are not designed to be replaced or disconnected during a normal operation. However, in some specific scenarios, they can be replaced:
- When the battery is old and does not hold capacity very well. In this scenario, batteries can be replaced.
- When storing Brian for a long time (for example, more than 3 months) without it being used, it is recommended to disconnect the batteries or even remove them from the case.
How to remove and reinstall the battery
Danger
Please follow this tutorial carefully, as an error in the re-installation may result in ineffective battery protection, which in some circumstances may lead to a battery fire.
-
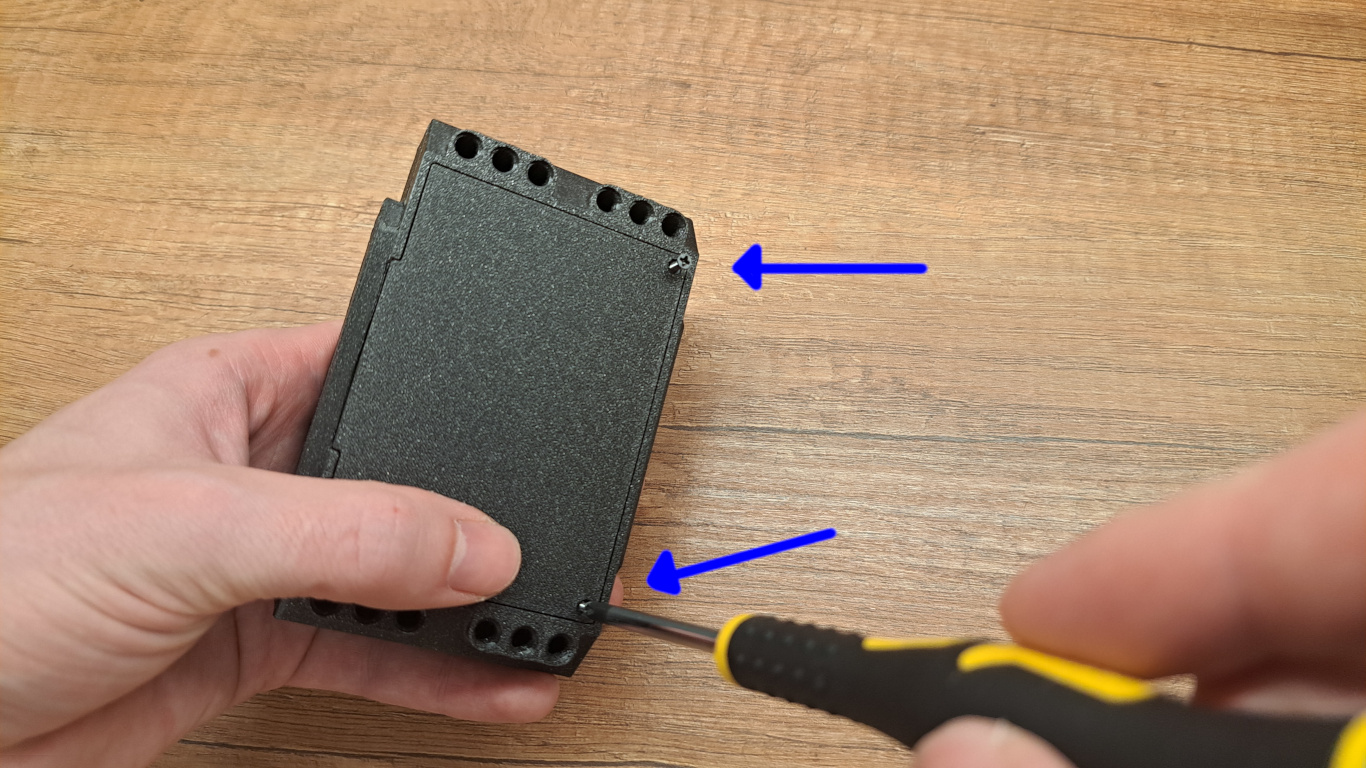
Unscrew the back lid and remove it. There are two screws, as indicated byt the arrows.
-
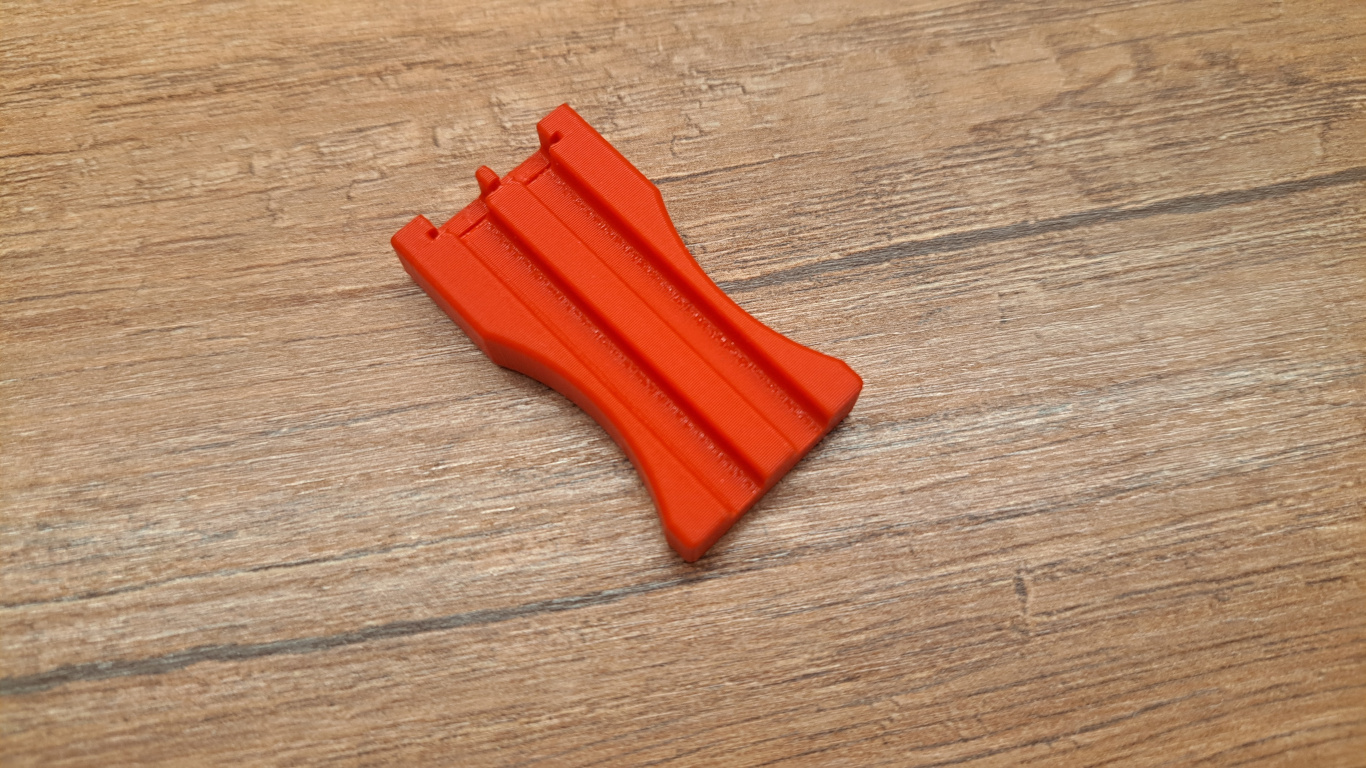
Prepare your battery removal tool. If you misplaced the one that came with Brian, you can 3D print your own: model on printables.com
-
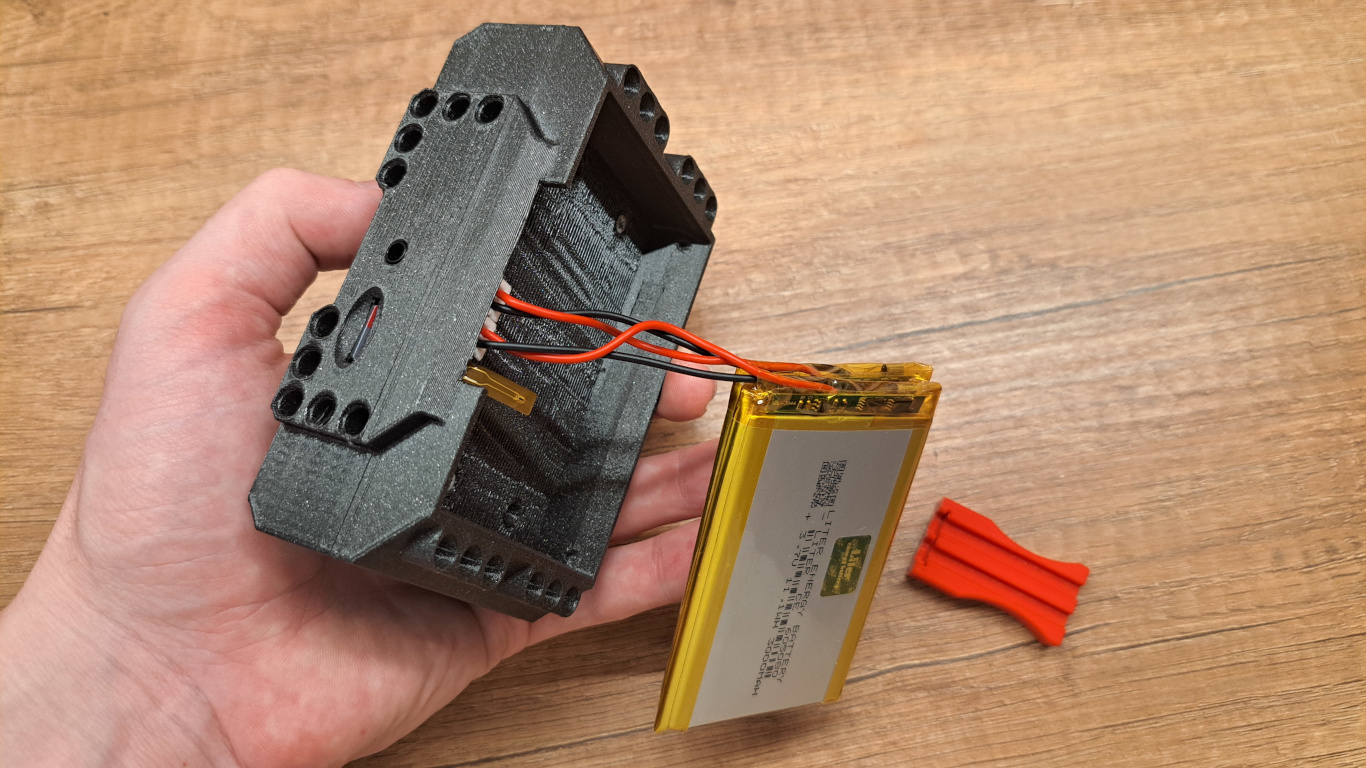
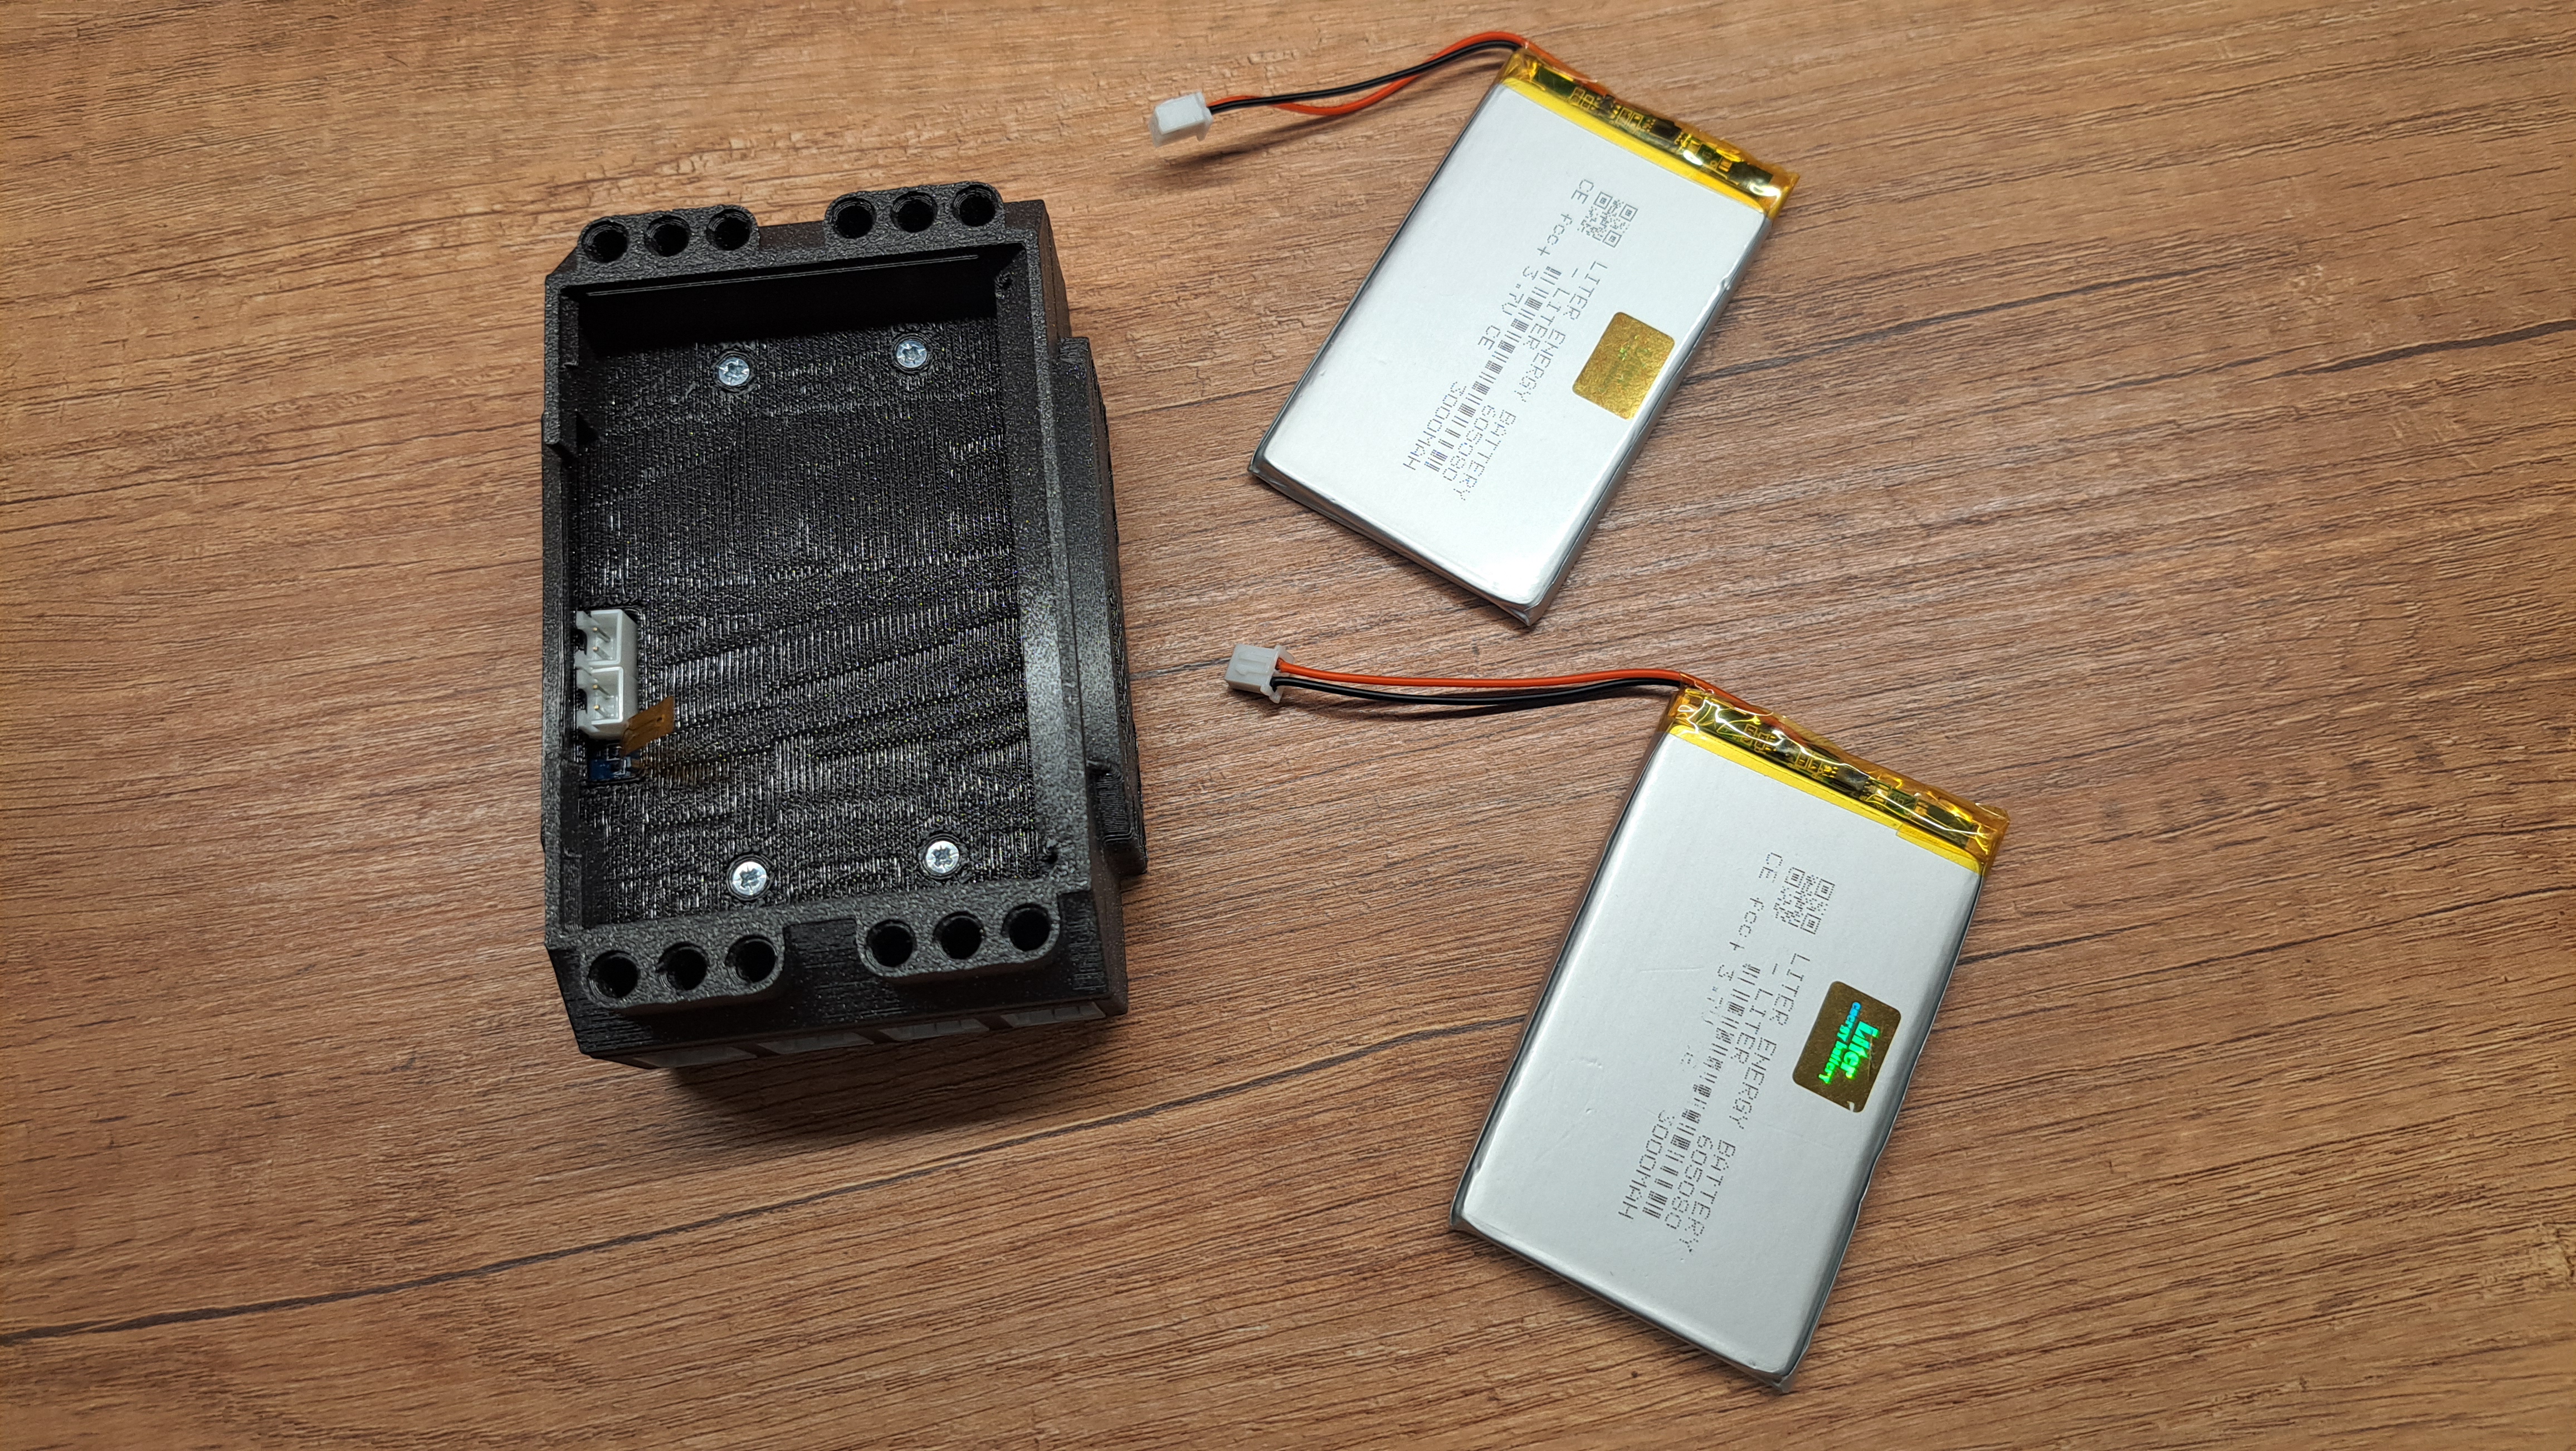
Gently pull out the battery cells, with the cables still connected. Make sure their weight is not supported by the cables, but are placed od a surface or you are holding them in your hands.
-
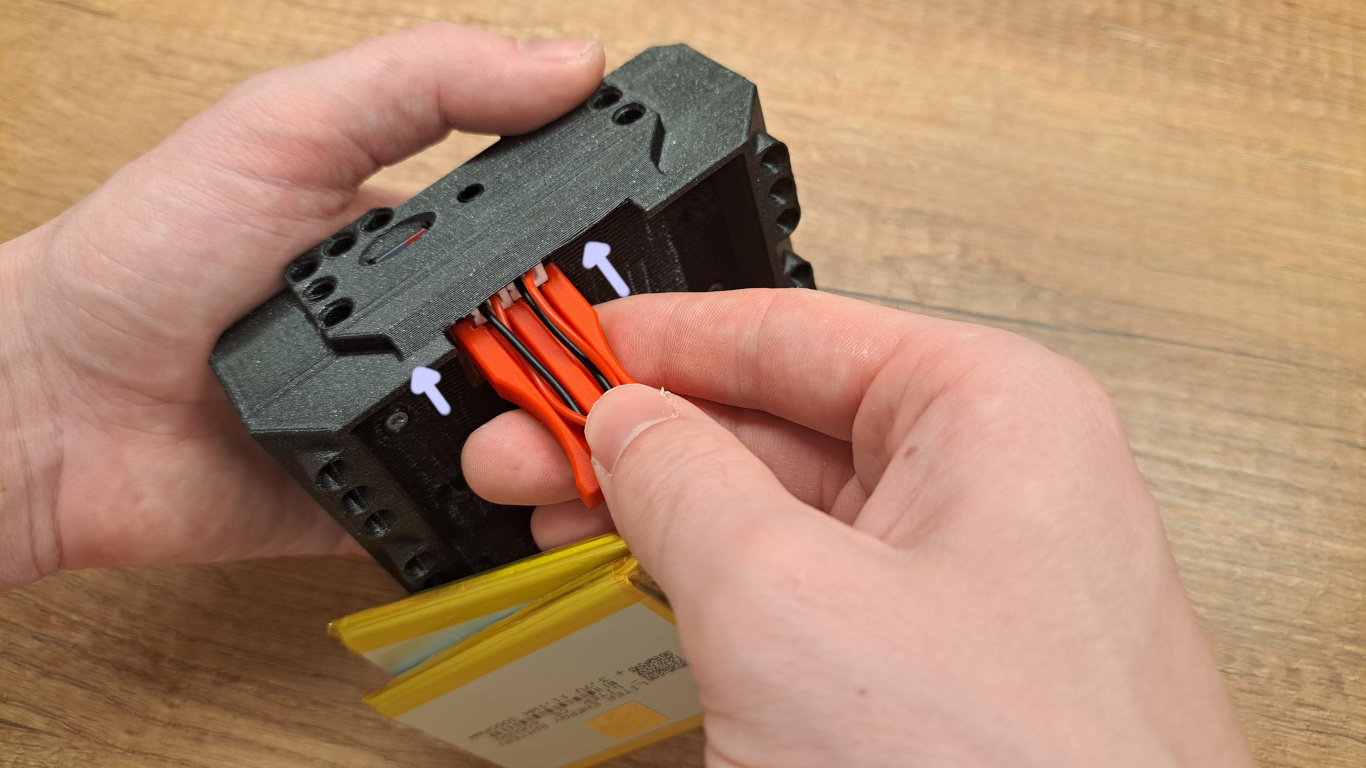
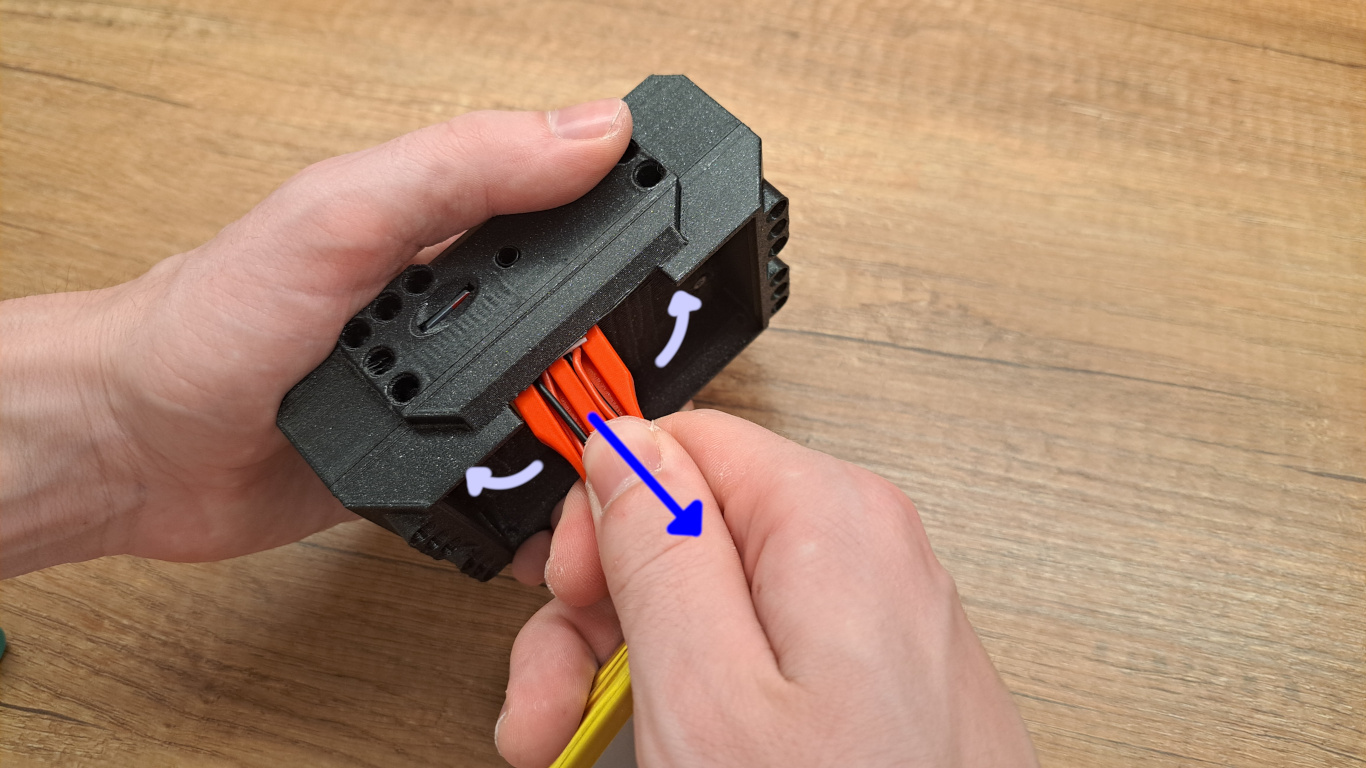
Insert the battery tool from the side, until it slides into both of the connectors.
-
Wiggle with the battery tool side to side gently, while pulling on it.
-
The battery cells are now safely disconnected
-
For long term storage, screw the lid back onto the bay so you don't loose the cover or the screws.
-
To start using Brian again, continue with the rest of the steps:
-
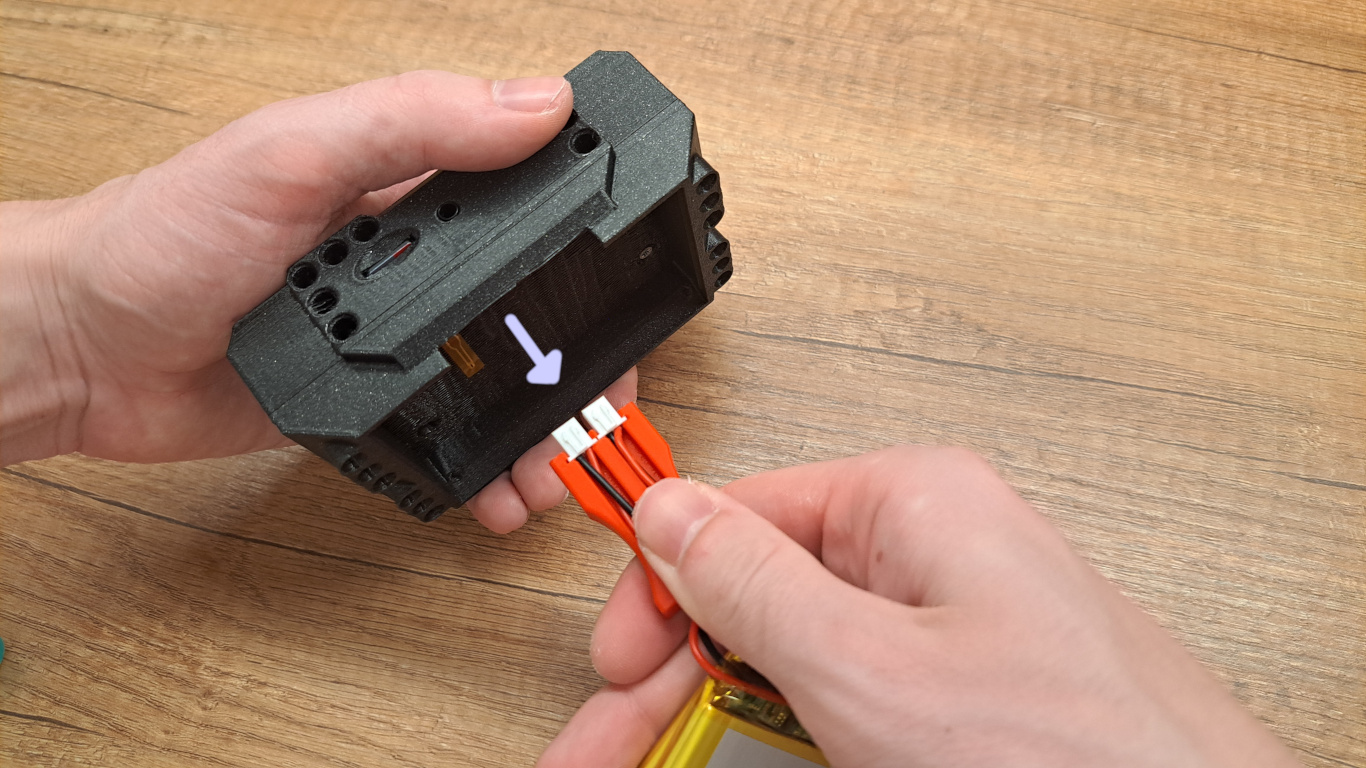
Connect the first cell to upper battery connector and insert it inside inside the bay.
-
Install the thermal probe on top of the first cell.
-
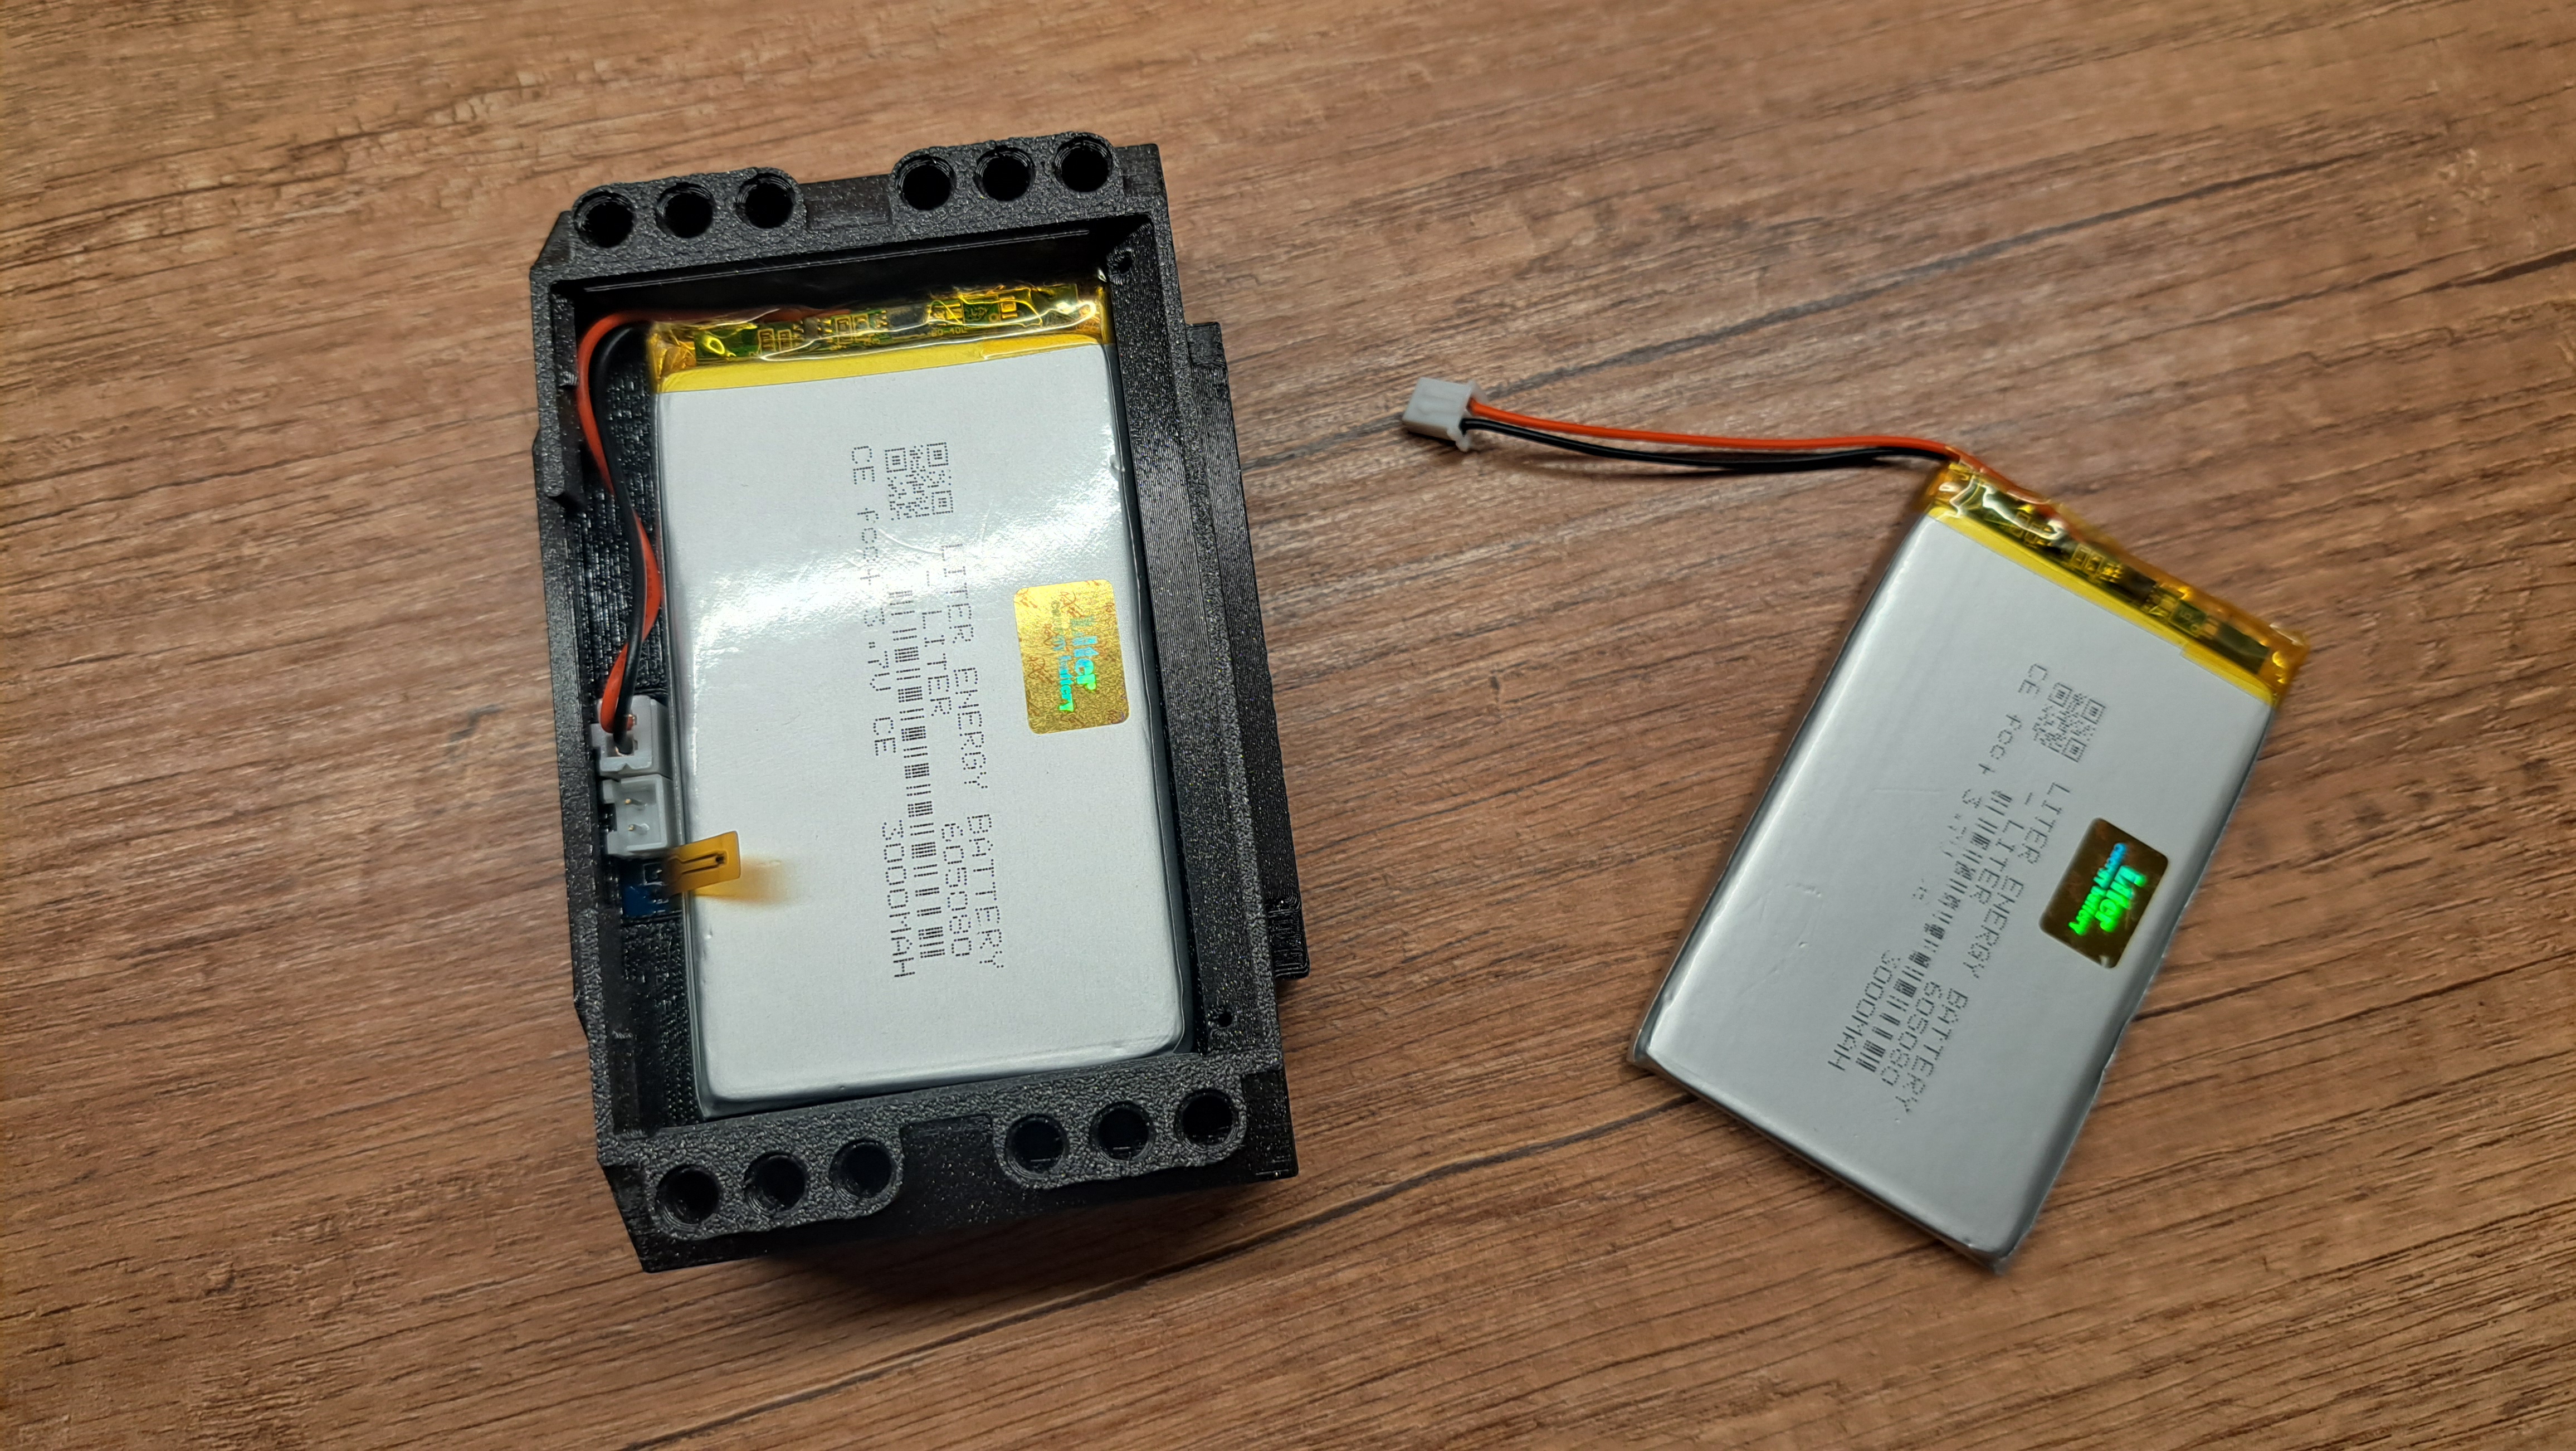
Connect the second cell into lower battery connector and insert it inside the bay. Make sure that the thermal probe is placed between the cells! If battery cable is not long enough, just place the second battery flipped.
-
Put the cables inside the bay and try to arrange them to not get clipped by the battery cover. Try to do it as the image below suggests.
-
Place the lid onto the bay and screw it back in.
-
The brick may be turned on now. Just check it and turn it off if you don't want to use it right away.